Ok. So last one on this for a while. Go read this one first if you haven’t: https://vskeeball.com/2026/01/23/pure-vvols-migrations-from-vsphere-to-proxmox/. I said at the end of the last post I said I had a tool for this. Well here you go: https://github.com/PureStorage-OpenConnect/proxmox-vvol-migrator
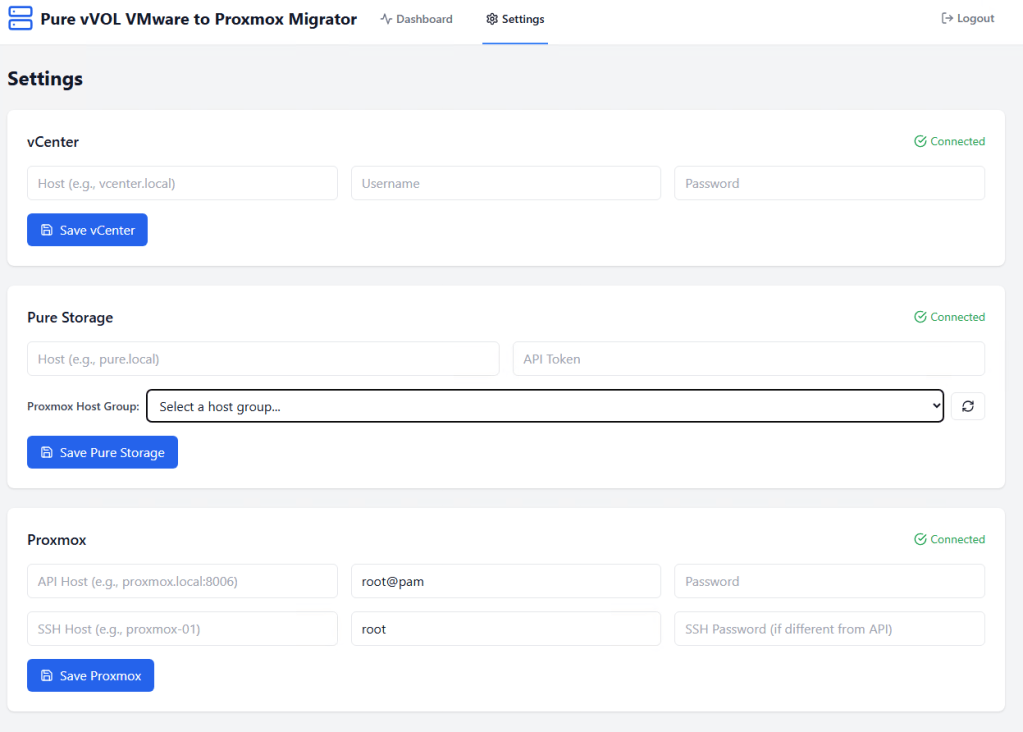
This tool gets installed on a Linux machine and hosts a web interface to do these migrations. On first startup it will make you create a username and password for the tool. Once you do that head on over to the settings tab and fill out the fields:
Once you gets those values in and the connected text appears head back over to the Dashboard tab, find your VM, and click Migrate.
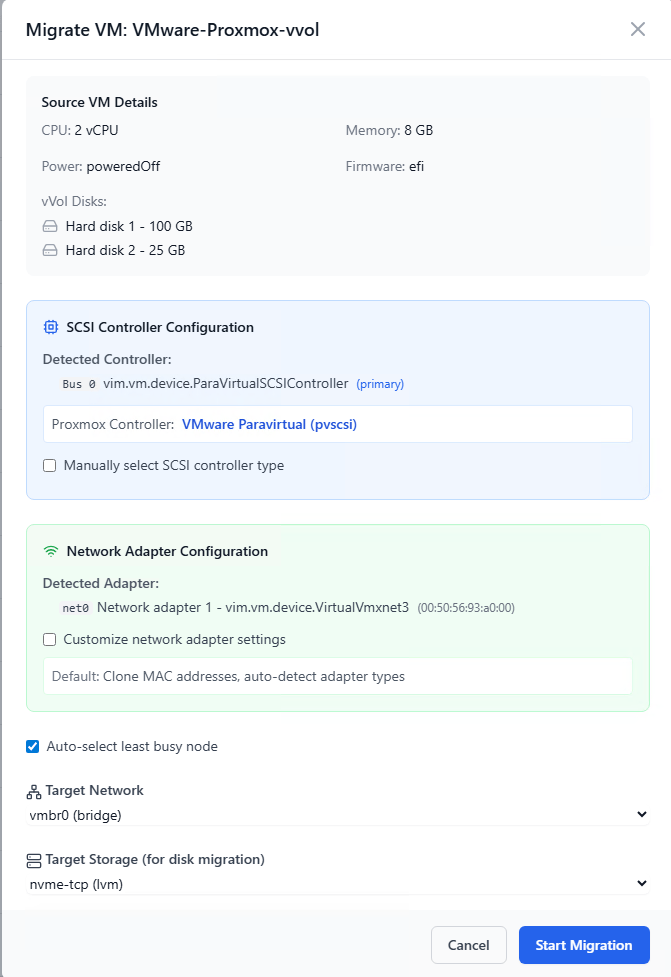
Make your selections. The tool tries to help you and configures the VM the same on the destination if possible. You really just need to select the target network and target storage. The target storage should be a LVM Thick volume. Then click Start Migration. Now scroll down to the Migration Jobs and you can click on the migration.

You can watch the migration proceed if you want.
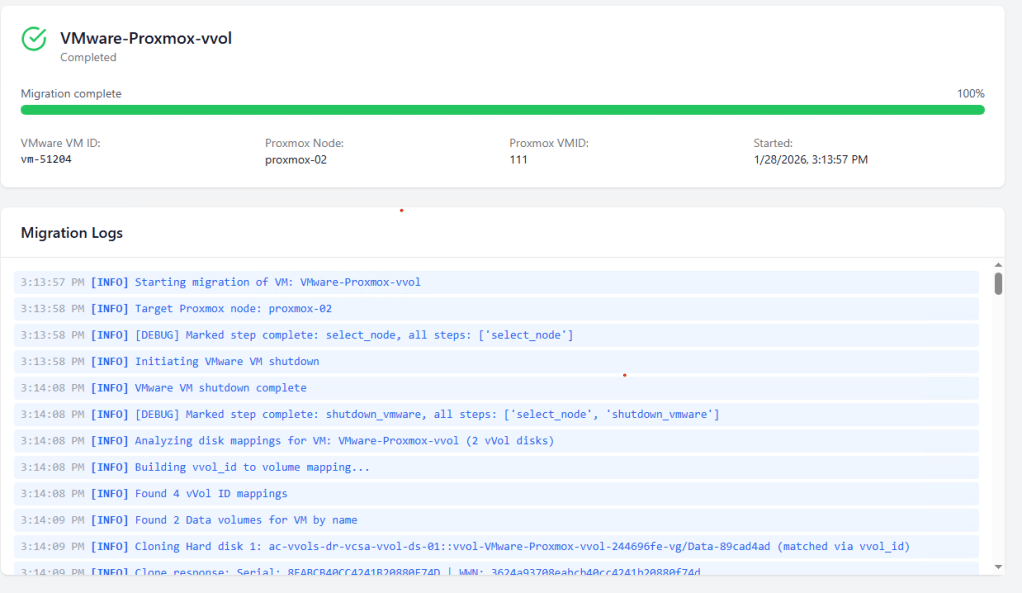
The basic logic is the same as the last post: Shutdown VM, clone the vvol disks on the arrary, filter the WWNs on lvm and kpartx, add the cloned volumes to the host group, rescan the scsi bus, create VM and add raw volumes as disks, power on VM, migrate storage to the destination storage, clean up. The steps up until migrate the disks are very fast. To the VM it looks like a reboot. The network adapater may need to be reconfigured in the VM but you can get around some of that in Linux with netplan by matching on the mac address not the nic name. After the migration you really need to make sure VMware tools is uninstalled and the virtio drivers are installed. Then update the VM configuration to use the virtio devices instead of the VMware ones. This does require a shutdown. If you try it out let me know how it goes. Use at your own risk of course. I’m not responsible for your environment.
